Verifying proofs with zkVerifyJS
All the codebase used in the tutorial can be explored here
In this tutorial we will be verifying proofs using zkVerify JS package. zkVerify JS is a NPM package which makes it very easy to submit proofs, listen events and get aggregation proofs. You can use this package with all the proof types we support.
Before starting the tutorial make sure to update your Node JS to the latest version (v24.1.0)
You can check your Node JS version with command node -v
Let's create a new project and install zkverify JS for our project. Run the following commands:
Create a new directory:
mkdir proof-submission
Navigate to the project directory:
cd proof-submission
Initialise an NPM project:
npm init -y && npm pkg set type=module
Install zkVerify JS and dotenv:
npm i zkverifyjs dotenv
Let's create a .env file to store our SEED PHRASE, which will be used later to send proofs for verification to zkVerify. Use the following code snippet to fill up your .env file.
SEED_PHRASE = "this is my seed phrase i should not share it with anyone"
Create a new file named index.js to write the verification logic. Open index.js in your IDE and import the following components from zkVerify JS and dotenv :
- Circom
- Risc Zero
- Ultrahonk
- Ultraplonk
- SP1
- Ezkl
import { zkVerifySession, Library, CurveType, ZkVerifyEvents } from "zkverifyjs";import dotenv from 'dotenv';dotenv.config();
import { zkVerifySession, ZkVerifyEvents, Risc0Version } from "zkverifyjs";import dotenv from 'dotenv';dotenv.config();
import { zkVerifySession, ZkVerifyEvents } from "zkverifyjs";import dotenv from 'dotenv';dotenv.config();
import { zkVerifySession, ZkVerifyEvents } from "zkverifyjs";import dotenv from 'dotenv';dotenv.config();
import { zkVerifySession, ZkVerifyEvents } from "zkverifyjs";import dotenv from 'dotenv';dotenv.config();
import { zkVerifySession, ZkVerifyEvents } from "zkverifyjs";import dotenv from 'dotenv';dotenv.config();
We would also need to import the required files we have generated already in previous tutorials, which are proof, verification key and public inputs. Use the following code snippets :
- Circom
- Risc Zero
- Ultrahonk
- Ultraplonk
- SP1
- Ezkl
import fs from "fs";const proof = JSON.parse(fs.readFileSync("./data/proof.json"));const publicInputs = JSON.parse(fs.readFileSync("./data/public.json"));const key = JSON.parse(fs.readFileSync("./data/main.groth16.vkey.json"));
import fs from "fs";const proof = JSON.parse(fs.readFileSync("../my_project/proof.json")); // Following the Risc Zero tutorial
import fs from "fs";const proof = fs.readFileSync('../target/zkv_proof.hex', 'utf-8');const publicInputs = fs.readFileSync('../target/zkv_pubs.hex', 'utf-8');const vk = fs.readFileSync('../target/zkv_vk.hex', 'utf-8');
import fs from "fs";const bufvk = fs.readFileSync("../target/vk");const bufproof = fs.readFileSync("../target/proof");const base64Proof = bufproof.toString("base64");const base64Vk = bufvk.toString("base64");
import fs from "fs";const proof = JSON.parse(fs.readFileSync("../my_project/proof.json")); // Following the SP1 tutorial
import fs from "fs";const proof = fs.readFileSync('../target/zkv_proof.hex', 'utf-8');const publicInputs = fs.readFileSync('../target/zkv_pubs.hex', 'utf-8');const vk = fs.readFileSync('../target/zkv_vk.hex', 'utf-8');
Next we will be writing the core logic to send proofs to zkVerify for verification. All the following code snippets should be inserted within async main function.
async function main(){// Required code}main();
Once you have all the requirements imported, we will start by instantiating a session with our Volta testnet with an account(This account should have $tVFY to pay for transactions).
const session = await zkVerifySession.start().Volta().withAccount(process.env.SEED_PHRASE);
Next we will send a proof verification request to the Volta testnet, with all the details like which proving schema, proof, public signals and the key. We will also need to specify the domainId for which we want this proof to be aggregated. You can check more about Domain and Aggregation here. For this tutorial, choose the Domain ID based on the target chain where you want to verify the attestations List of existing domains. We will also create an event listener, to listen to the NewAggregationReceipt event whenever our proof is aggregated :
- Circom
- Risc Zero
- Ultrahonk
- Ultraplonk
- SP1
- Ezkl
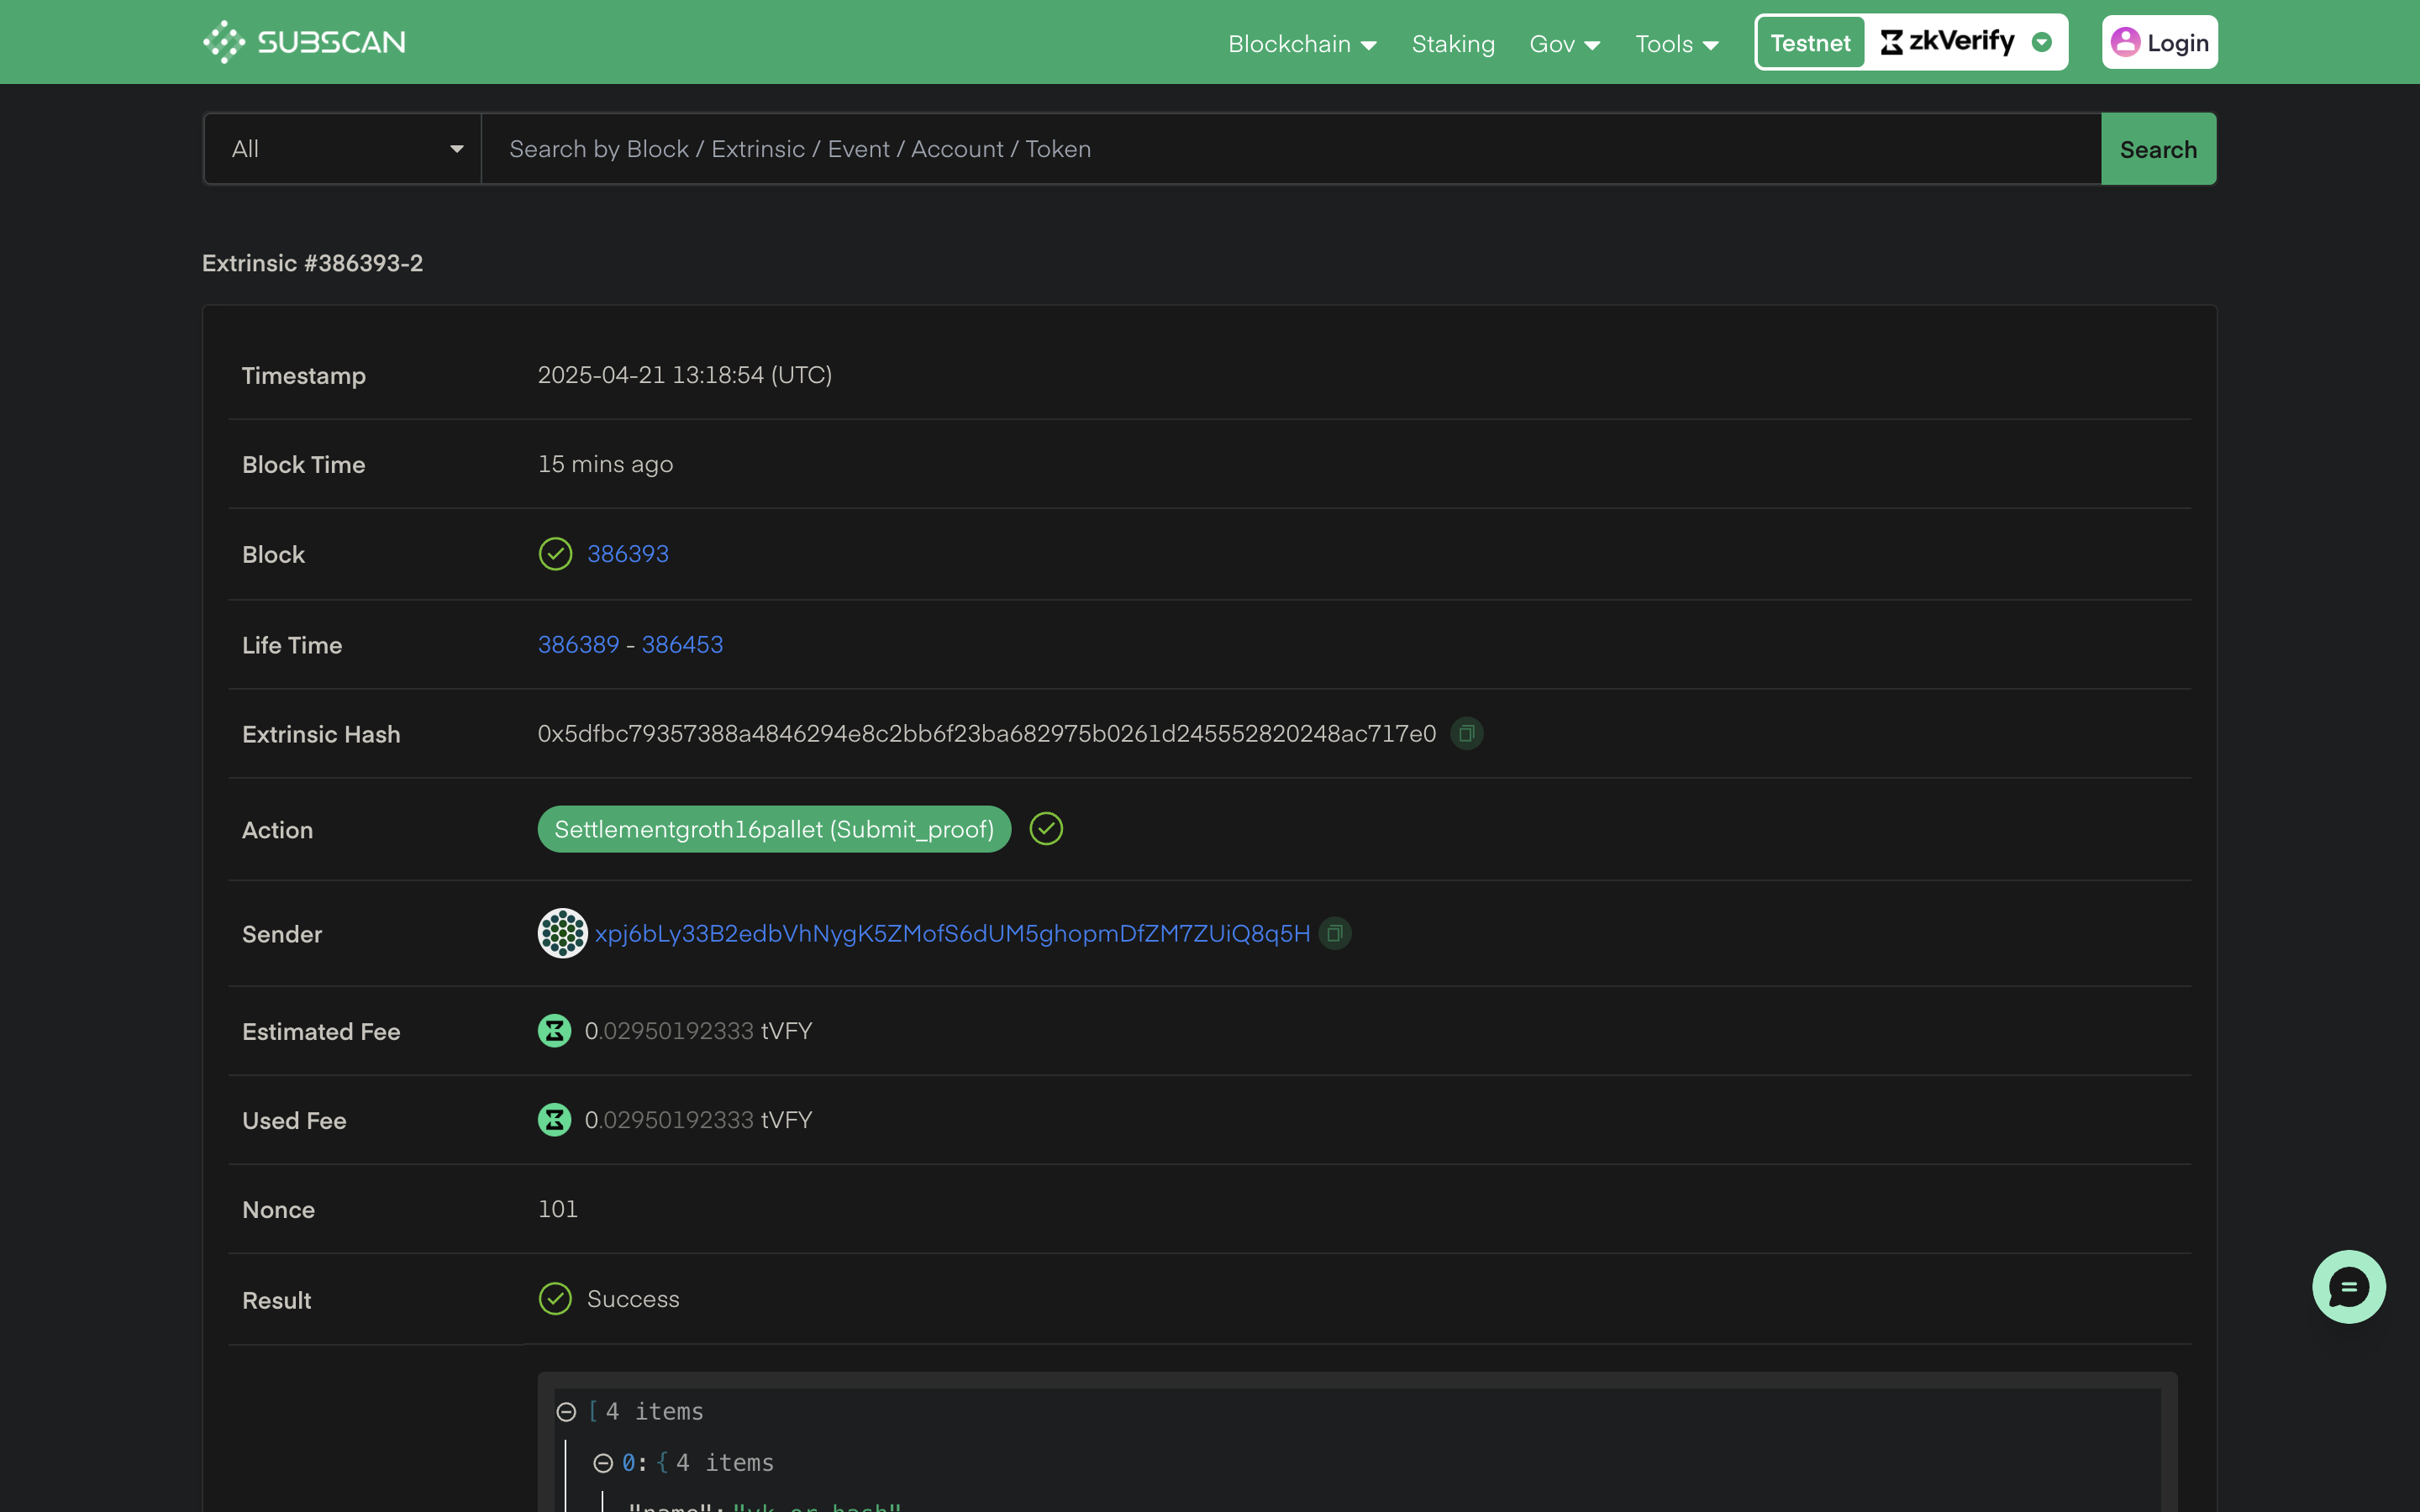
let statement, aggregationId;session.subscribe([{event: ZkVerifyEvents.NewAggregationReceipt,callback: async (eventData) => {console.log("New aggregation receipt:", eventData);if(aggregationId == parseInt(eventData.data.aggregationId.replace(/,/g, ''))){let statementpath = await session.getAggregateStatementPath(eventData.blockHash,parseInt(eventData.data.domainId),parseInt(eventData.data.aggregationId.replace(/,/g, '')),statement);console.log("Statement path:", statementpath);const statementproof = {...statementpath,domainId: parseInt(eventData.data.domainId),aggregationId: parseInt(eventData.data.aggregationId.replace(/,/g, '')),};fs.writeFileSync("aggregation.json", JSON.stringify(statementproof));}},options: { domainId: 0 },},]);const {events} = await session.verify().groth16({library: Library.snarkjs, curve: CurveType.bn128}).execute({proofData: {vk: key,proof: proof,publicSignals: publicInputs}, domainId: 0});
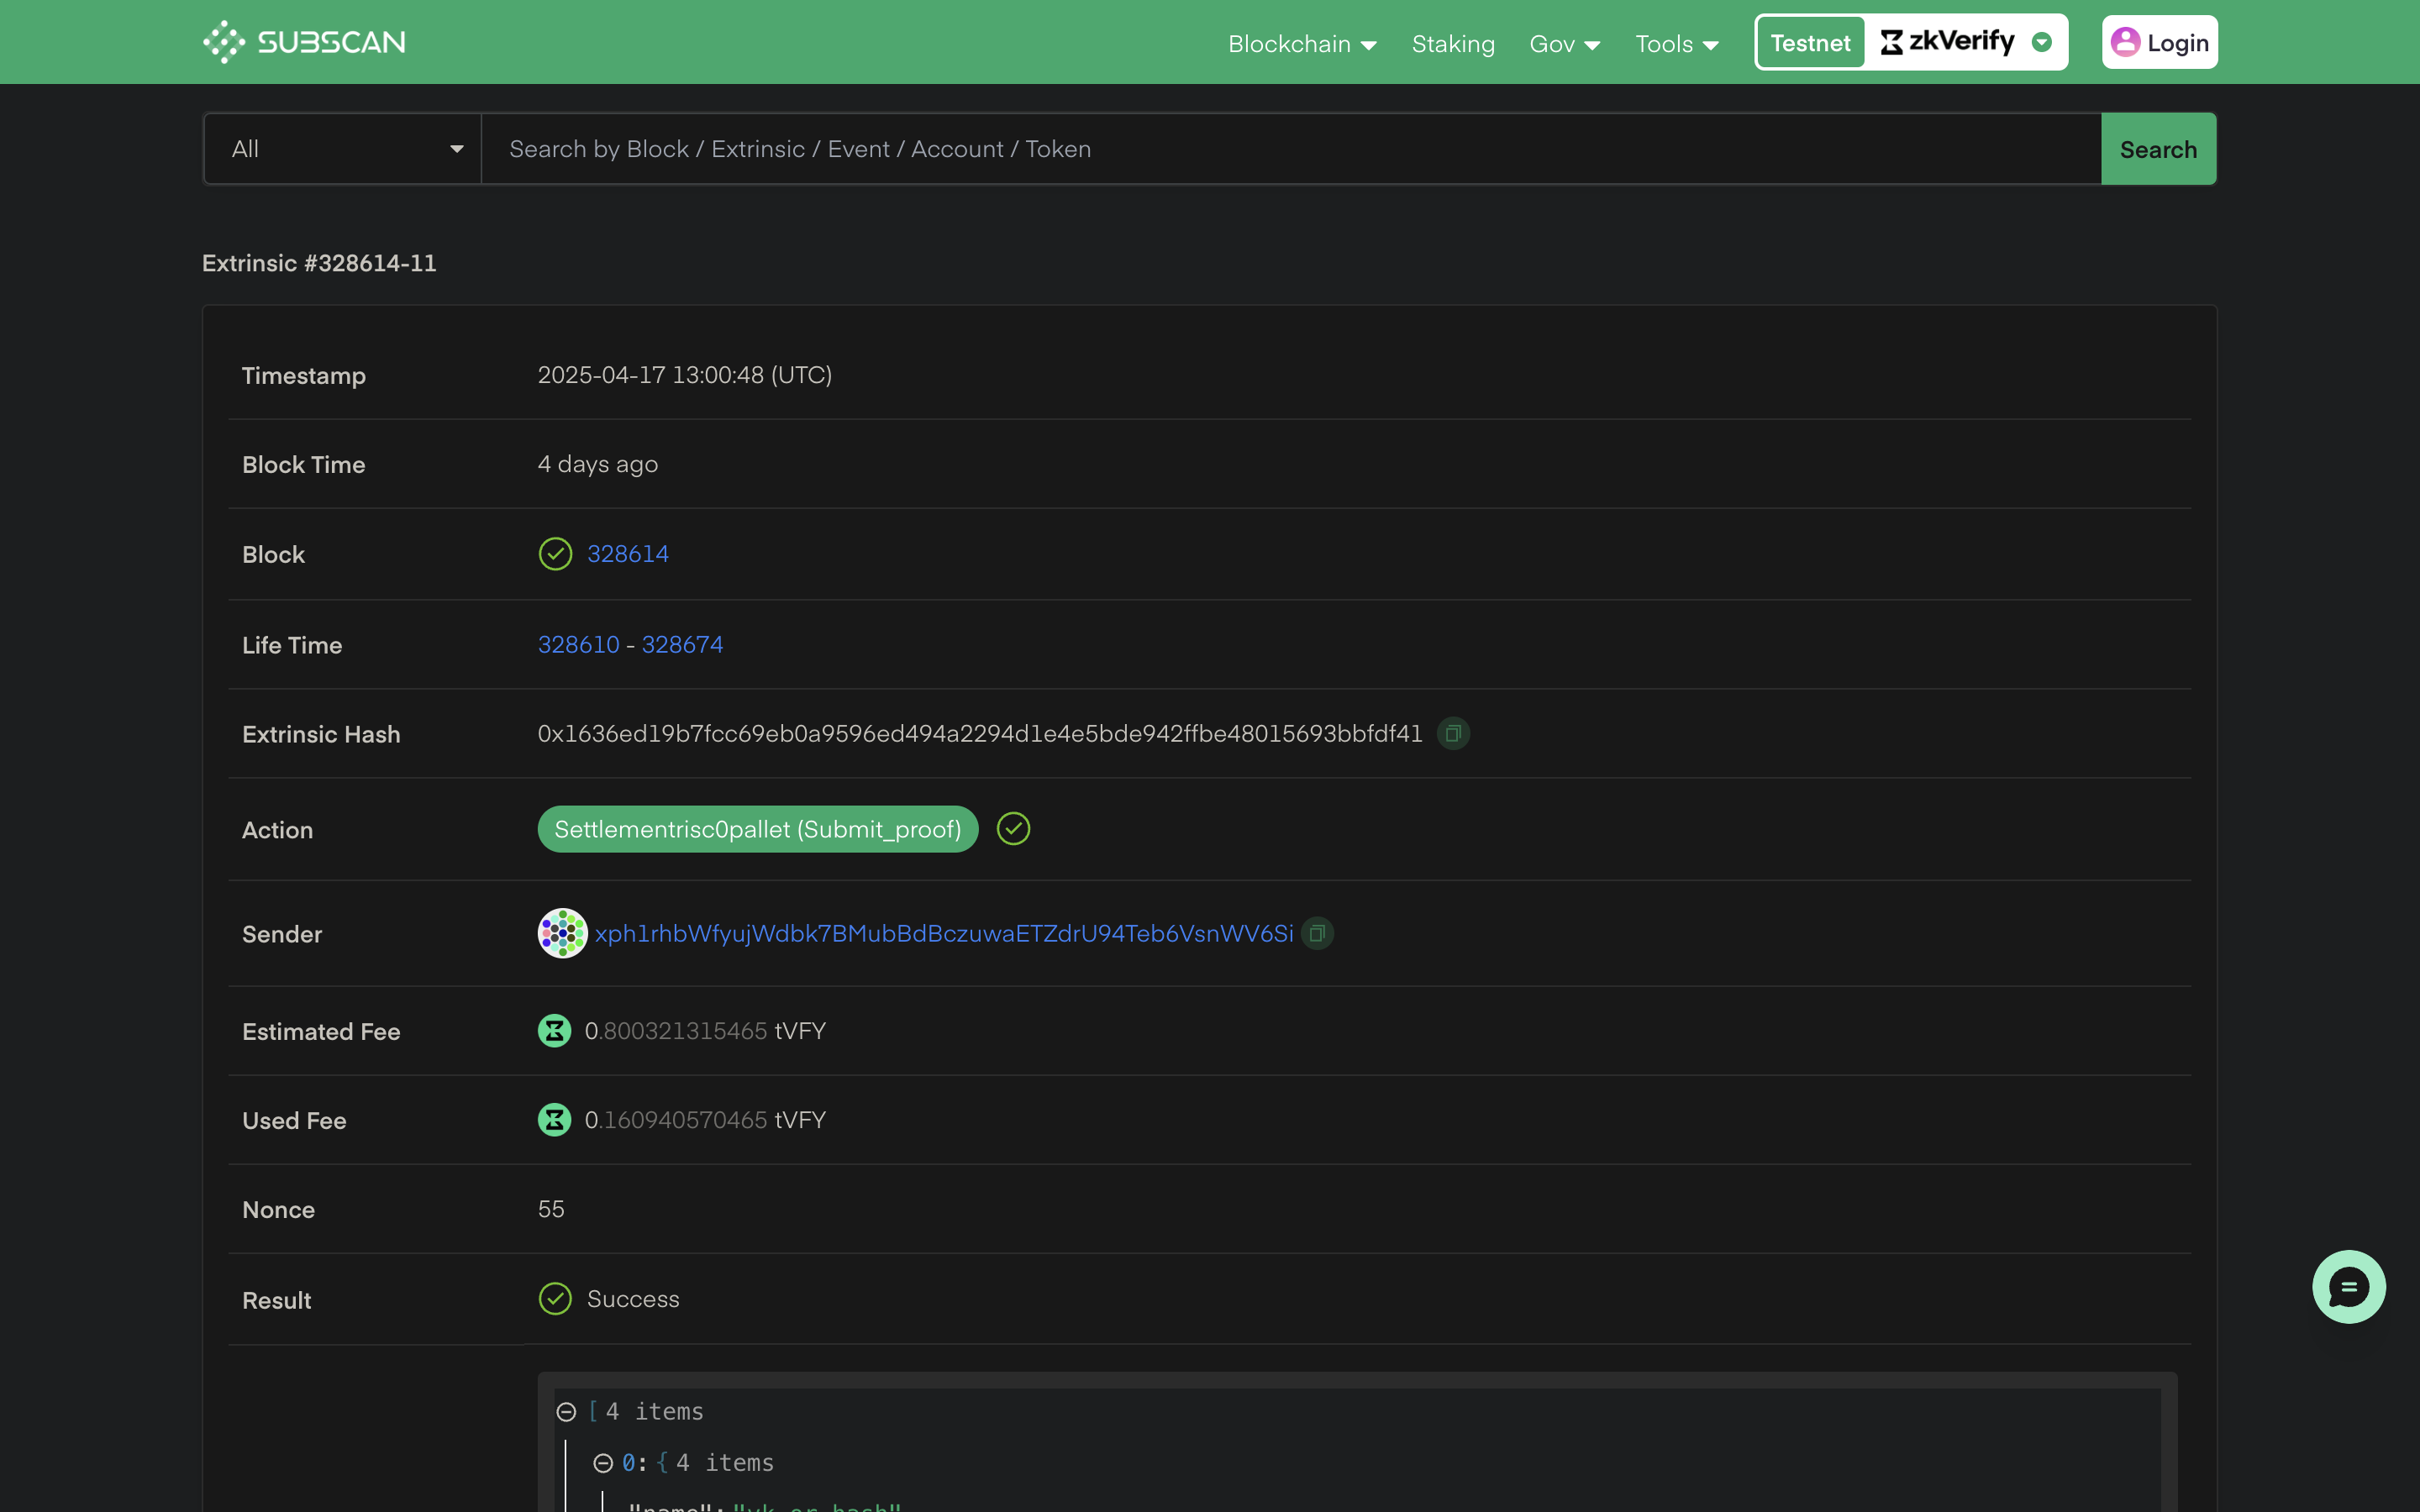
let statement, aggregationId;session.subscribe([{event: ZkVerifyEvents.NewAggregationReceipt,callback: async (eventData) => {console.log("New aggregation receipt:", eventData);if(aggregationId == parseInt(eventData.data.aggregationId.replace(/,/g, ''))){let statementpath = await session.getAggregateStatementPath(eventData.blockHash,parseInt(eventData.data.domainId),parseInt(eventData.data.aggregationId.replace(/,/g, '')),statement);console.log("Statement path:", statementpath);const statementproof = {...statementpath,domainId: parseInt(eventData.data.domainId),aggregationId: parseInt(eventData.data.aggregationId.replace(/,/g, '')),};fs.writeFileSync("aggregation.json", JSON.stringify(statementproof));}},options: { domainId: 0 },},]);const {events} = await session.verify().risc0({ version: Risc0Version.V2_1} ) // Mention the R0 version used while proving.execute({proofData:{proof: proof.proof,vk: proof.image_id,publicSignals: proof.pub_inputs,}, domainId: 0})
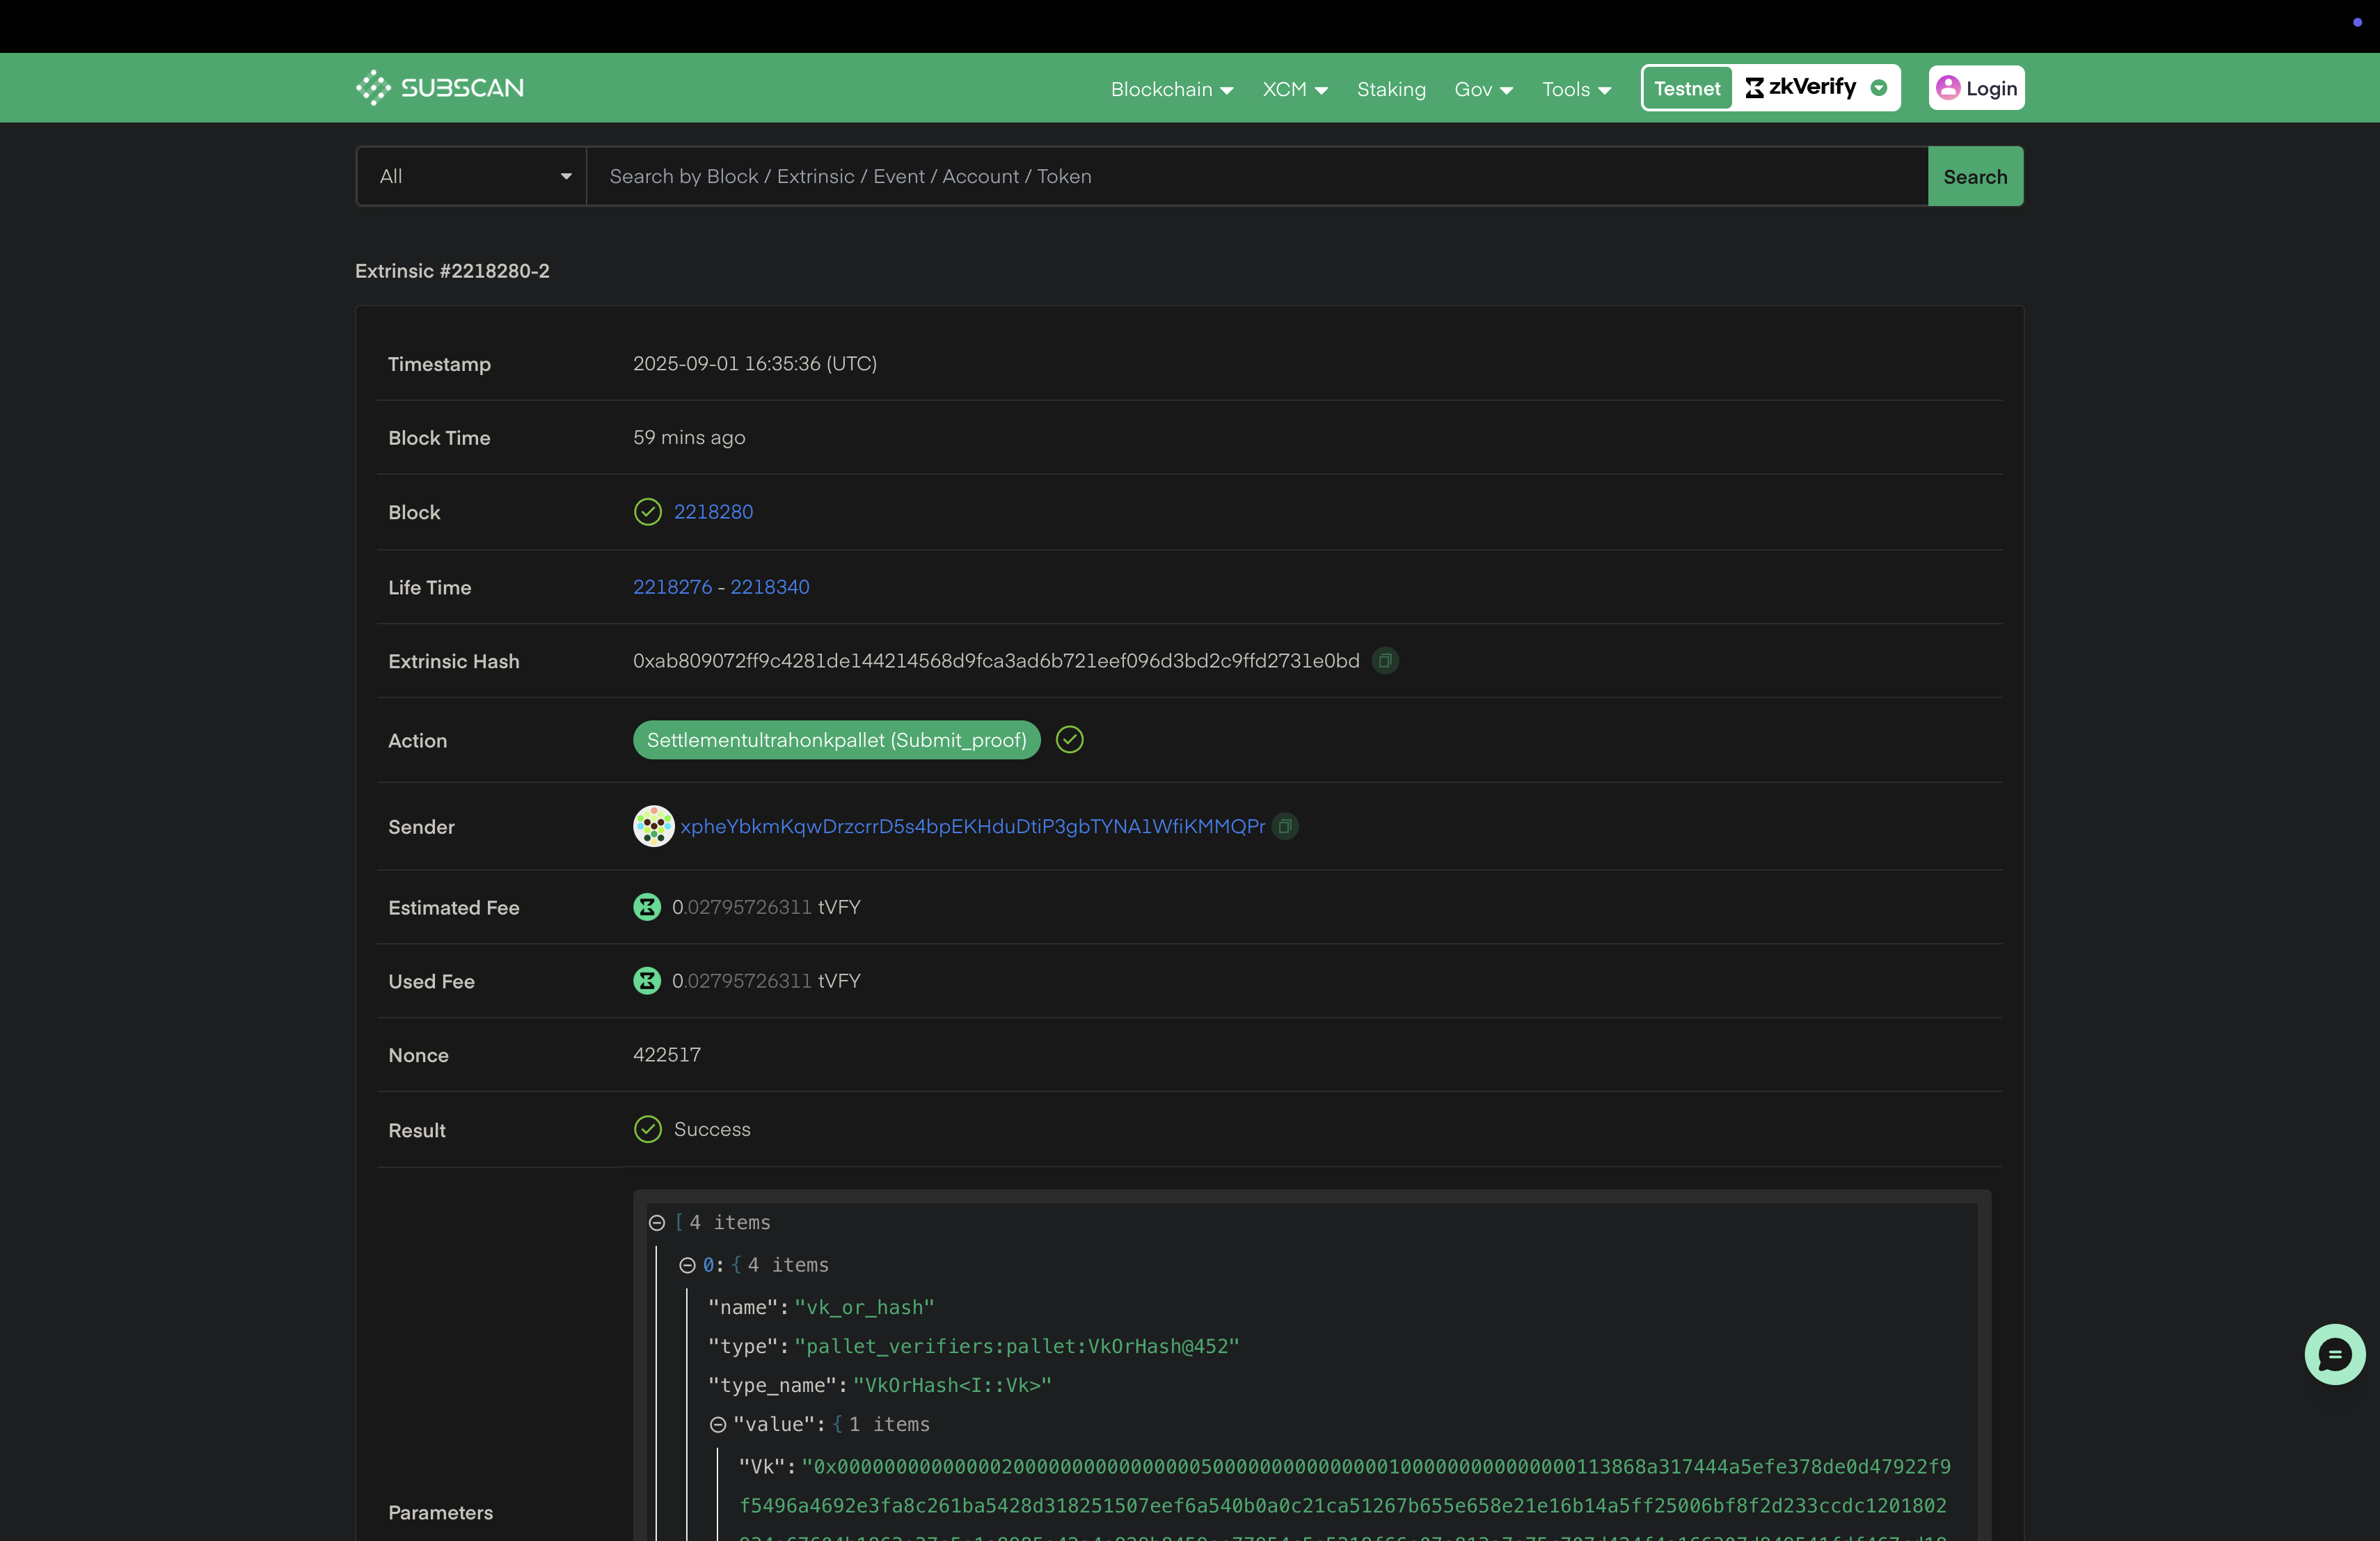
let statement, aggregationId;session.subscribe([{event: ZkVerifyEvents.NewAggregationReceipt,callback: async (eventData) => {console.log("New aggregation receipt:", eventData);if(aggregationId == parseInt(eventData.data.aggregationId.replace(/,/g, ''))){let statementpath = await session.getAggregateStatementPath(eventData.blockHash,parseInt(eventData.data.domainId),parseInt(eventData.data.aggregationId.replace(/,/g, '')),statement);console.log("Statement path:", statementpath);const statementproof = {...statementpath,domainId: parseInt(eventData.data.domainId),aggregationId: parseInt(eventData.data.aggregationId.replace(/,/g, '')),};fs.writeFileSync("aggregation.json", JSON.stringify(statementproof));}},options: { domainId: 0 },},]);const {events} = await session.verify().ultrahonk().execute({proofData: {vk: vk.split("\n")[0],proof: proof.split("\n")[0],publicSignals: publicInputs.split("\n").slice(0,-1)}, domainId: 0});
let statement, aggregationId;session.subscribe([{event: ZkVerifyEvents.NewAggregationReceipt,callback: async (eventData) => {console.log("New aggregation receipt:", eventData);if(aggregationId == parseInt(eventData.data.aggregationId.replace(/,/g, ''))){let statementpath = await session.getAggregateStatementPath(eventData.blockHash,parseInt(eventData.data.domainId),parseInt(eventData.data.aggregationId.replace(/,/g, '')),statement);console.log("Statement path:", statementpath);const statementproof = {...statementpath,domainId: parseInt(eventData.data.domainId),aggregationId: parseInt(eventData.data.aggregationId.replace(/,/g, '')),};fs.writeFileSync("aggregation.json", JSON.stringify(statementproof));}},options: { domainId: 0 },},]);const {events} = await session.verify().ultraplonk({numberOfPublicInputs: 2}) // Make sure to replace the numberOfPublicInputs field as per your circuit.execute({proofData: {vk: base64Vk,proof: base64Proof,}, domainId: 0});
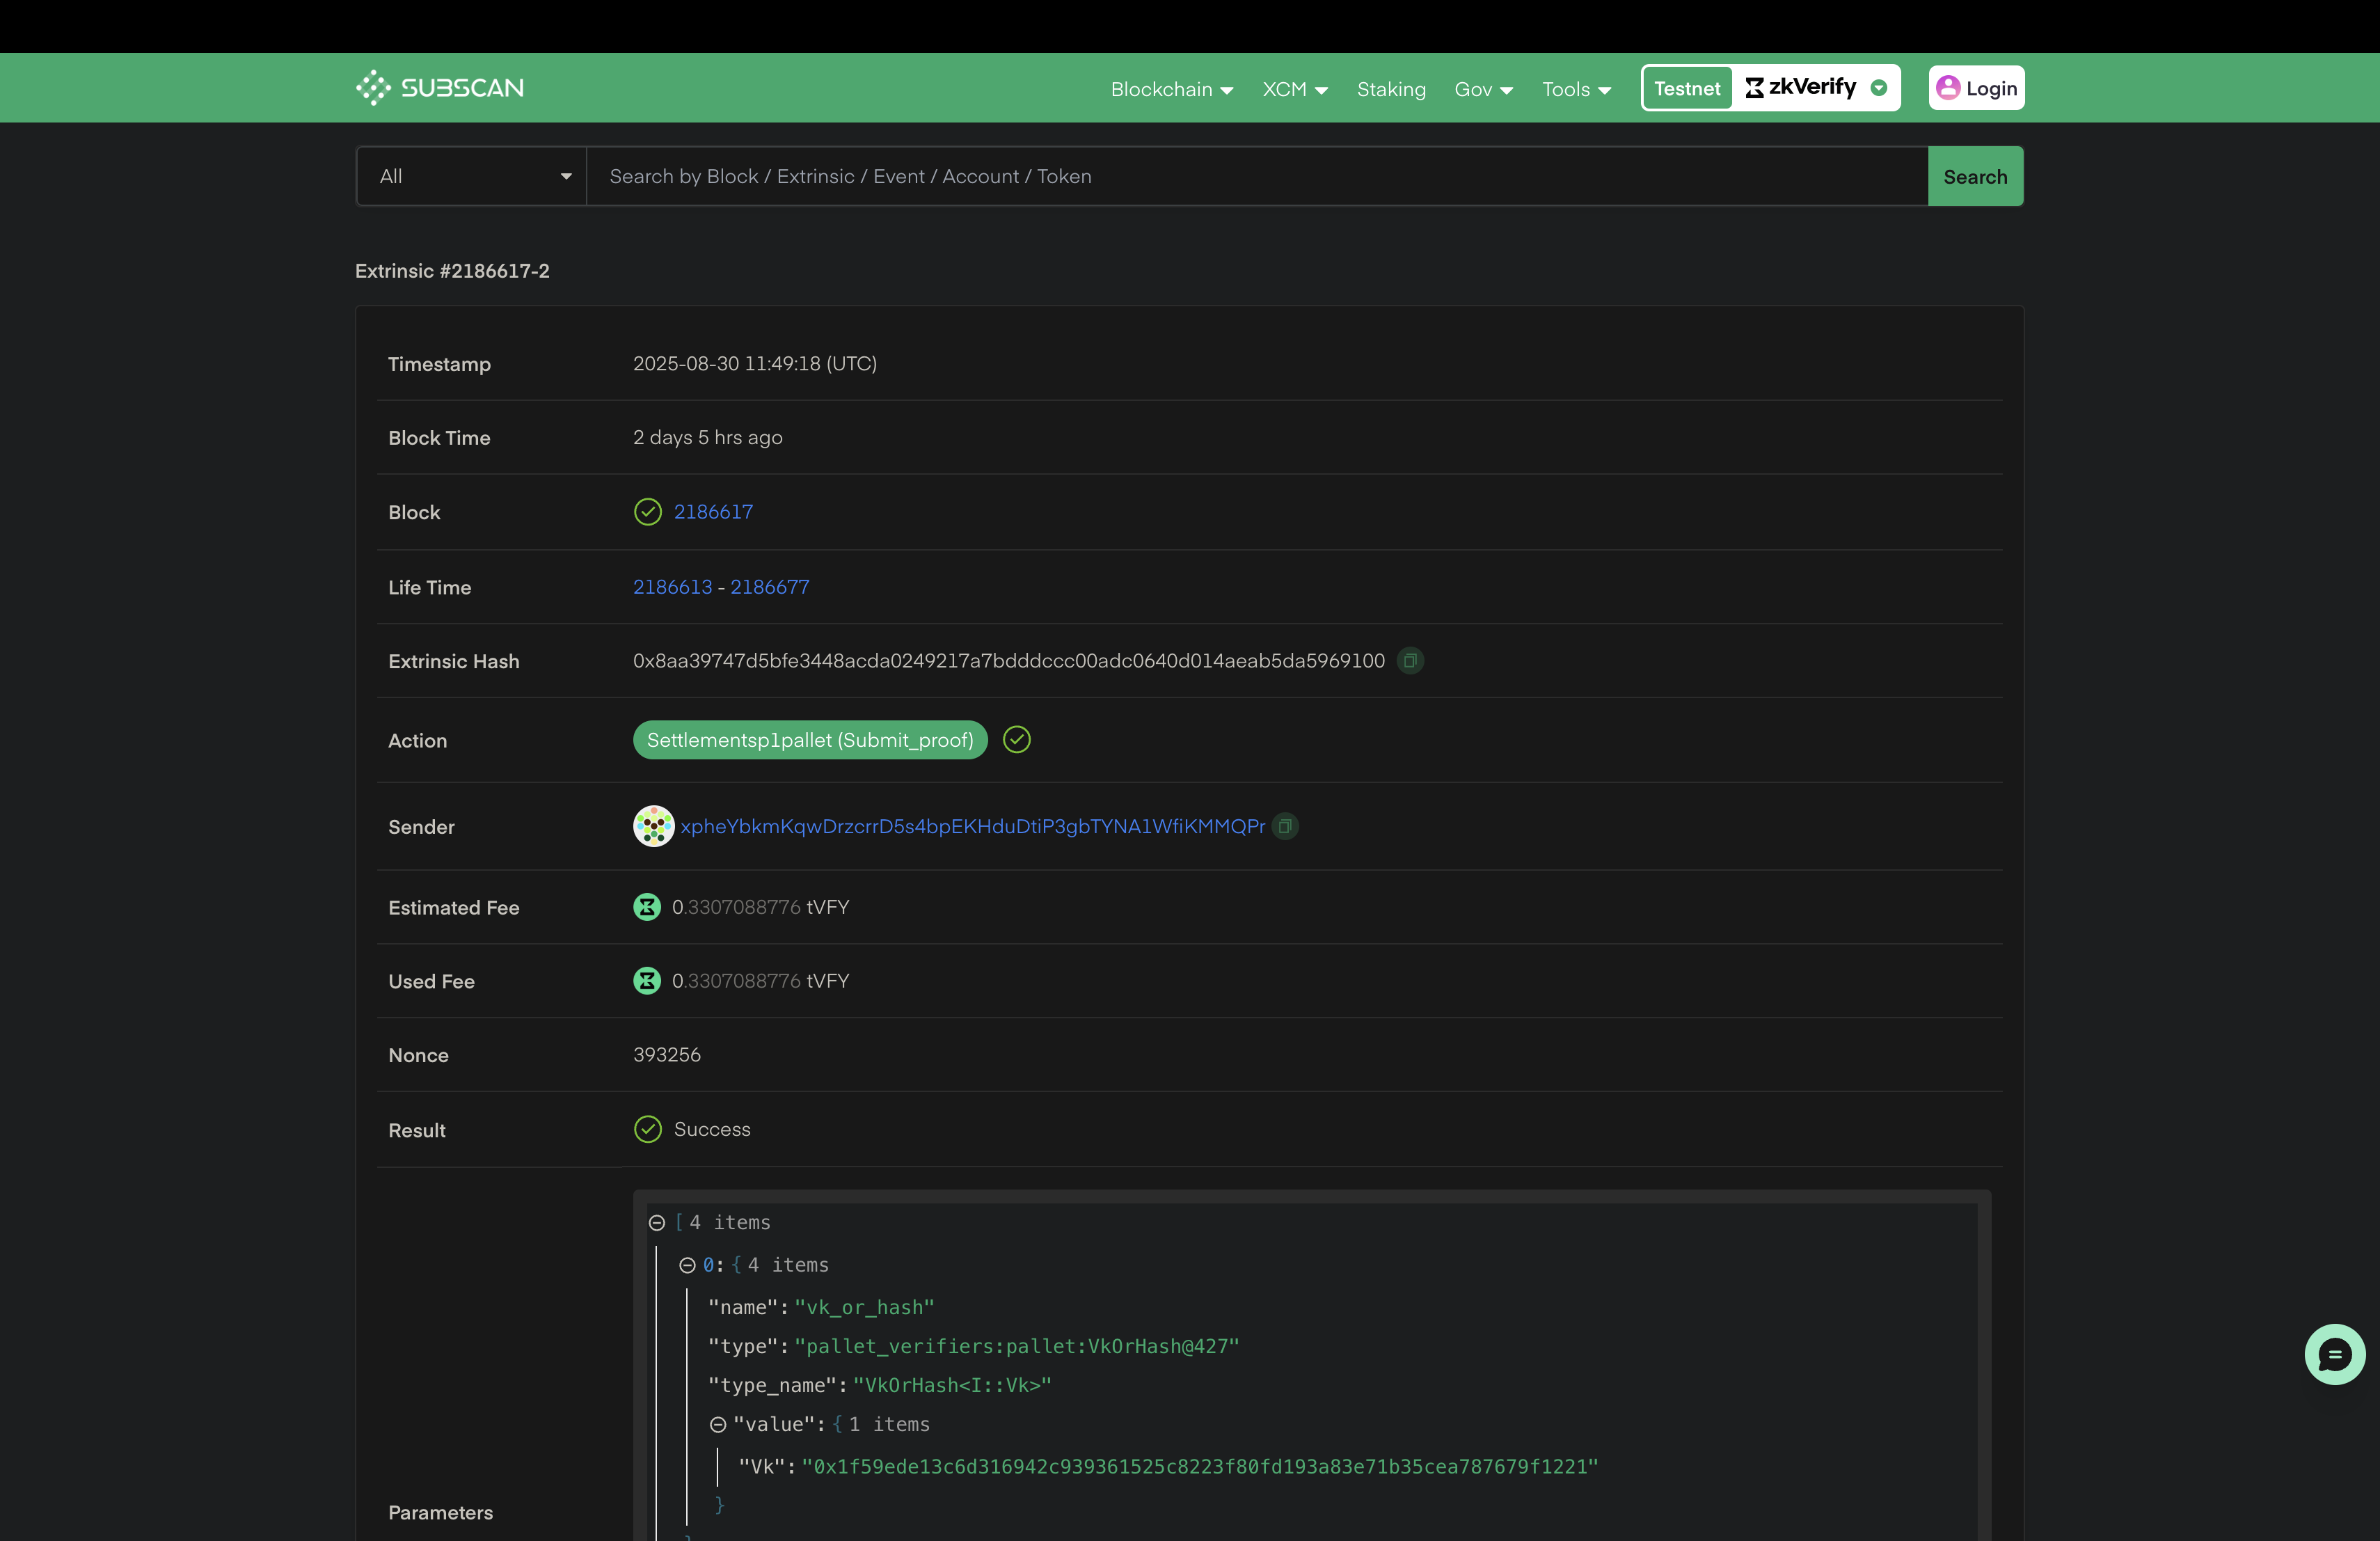
let statement, aggregationId;session.subscribe([{event: ZkVerifyEvents.NewAggregationReceipt,callback: async (eventData) => {console.log("New aggregation receipt:", eventData);if(aggregationId == parseInt(eventData.data.aggregationId.replace(/,/g, ''))){let statementpath = await session.getAggregateStatementPath(eventData.blockHash,parseInt(eventData.data.domainId),parseInt(eventData.data.aggregationId.replace(/,/g, '')),statement);console.log("Statement path:", statementpath);const statementproof = {...statementpath,domainId: parseInt(eventData.data.domainId),aggregationId: parseInt(eventData.data.aggregationId.replace(/,/g, '')),};fs.writeFileSync("aggregation.json", JSON.stringify(statementproof));}},options: { domainId: 0 },},]);const {events} = await session.verify().sp1().execute({proofData:{proof: proof.proof,vk: proof.image_id,publicSignals: proof.pub_inputs,}, domainId: 0})
let statement, aggregationId;session.subscribe([{event: ZkVerifyEvents.NewAggregationReceipt,callback: async (eventData) => {console.log("New aggregation receipt:", eventData);if(aggregationId == parseInt(eventData.data.aggregationId.replace(/,/g, ''))){let statementpath = await session.getAggregateStatementPath(eventData.blockHash,parseInt(eventData.data.domainId),parseInt(eventData.data.aggregationId.replace(/,/g, '')),statement);console.log("Statement path:", statementpath);const statementproof = {...statementpath,domainId: parseInt(eventData.data.domainId),aggregationId: parseInt(eventData.data.aggregationId.replace(/,/g, '')),};fs.writeFileSync("aggregation.json", JSON.stringify(statementproof));}},options: { domainId: 0 },},]);const {events} = await session.verify().ezkl().execute({proofData: {vk: vk.split("\n")[0],proof: proof.split("\n")[0],publicSignals: publicInputs.split("\n").slice(0,-1)}, domainId: 0});
We can listen to events to get the current status of our submitted proof, and collect important data required for attestation verification. We have custom events for block inclusion, transaction finalization, etc. You can listen to them using our events.on() function like :
events.on(ZkVerifyEvents.IncludedInBlock, (eventData) => {console.log("Included in block", eventData);statement = eventData.statement;aggregationId = eventData.aggregationId;})
Now you can run this script using the command node index.js. After running the script a new file named aggregation.json would have been created, which has the all the details required to verify the aggregation on the target chain. You would find something like the following:
{"root": "0xef4752160e8d7ccbc254a87f71256990f2fcd8173e15a592f7ccc7e130aa5ab0","proof": ["0x40fbf21f1990ef8d1425d12ec550176fe848a7c63f0c59f7a48101e51c9aceee","0x0be311c3643fb3fcd2b59bf4cfd02bdef943caf78f92d94a080659468c38fef9","0x2117831ac2000ccdbb51f5deef96d215961ca42920a9196259e8b6e91b9fef53"],"numberOfLeaves": 8,"leafIndex": 0,"leaf": "0xc5a8389b231522aad8360d940eb3ce275f0446bba1a9bd188b31d1c7dd37f136","domainId": 0,"aggregationId": 137}
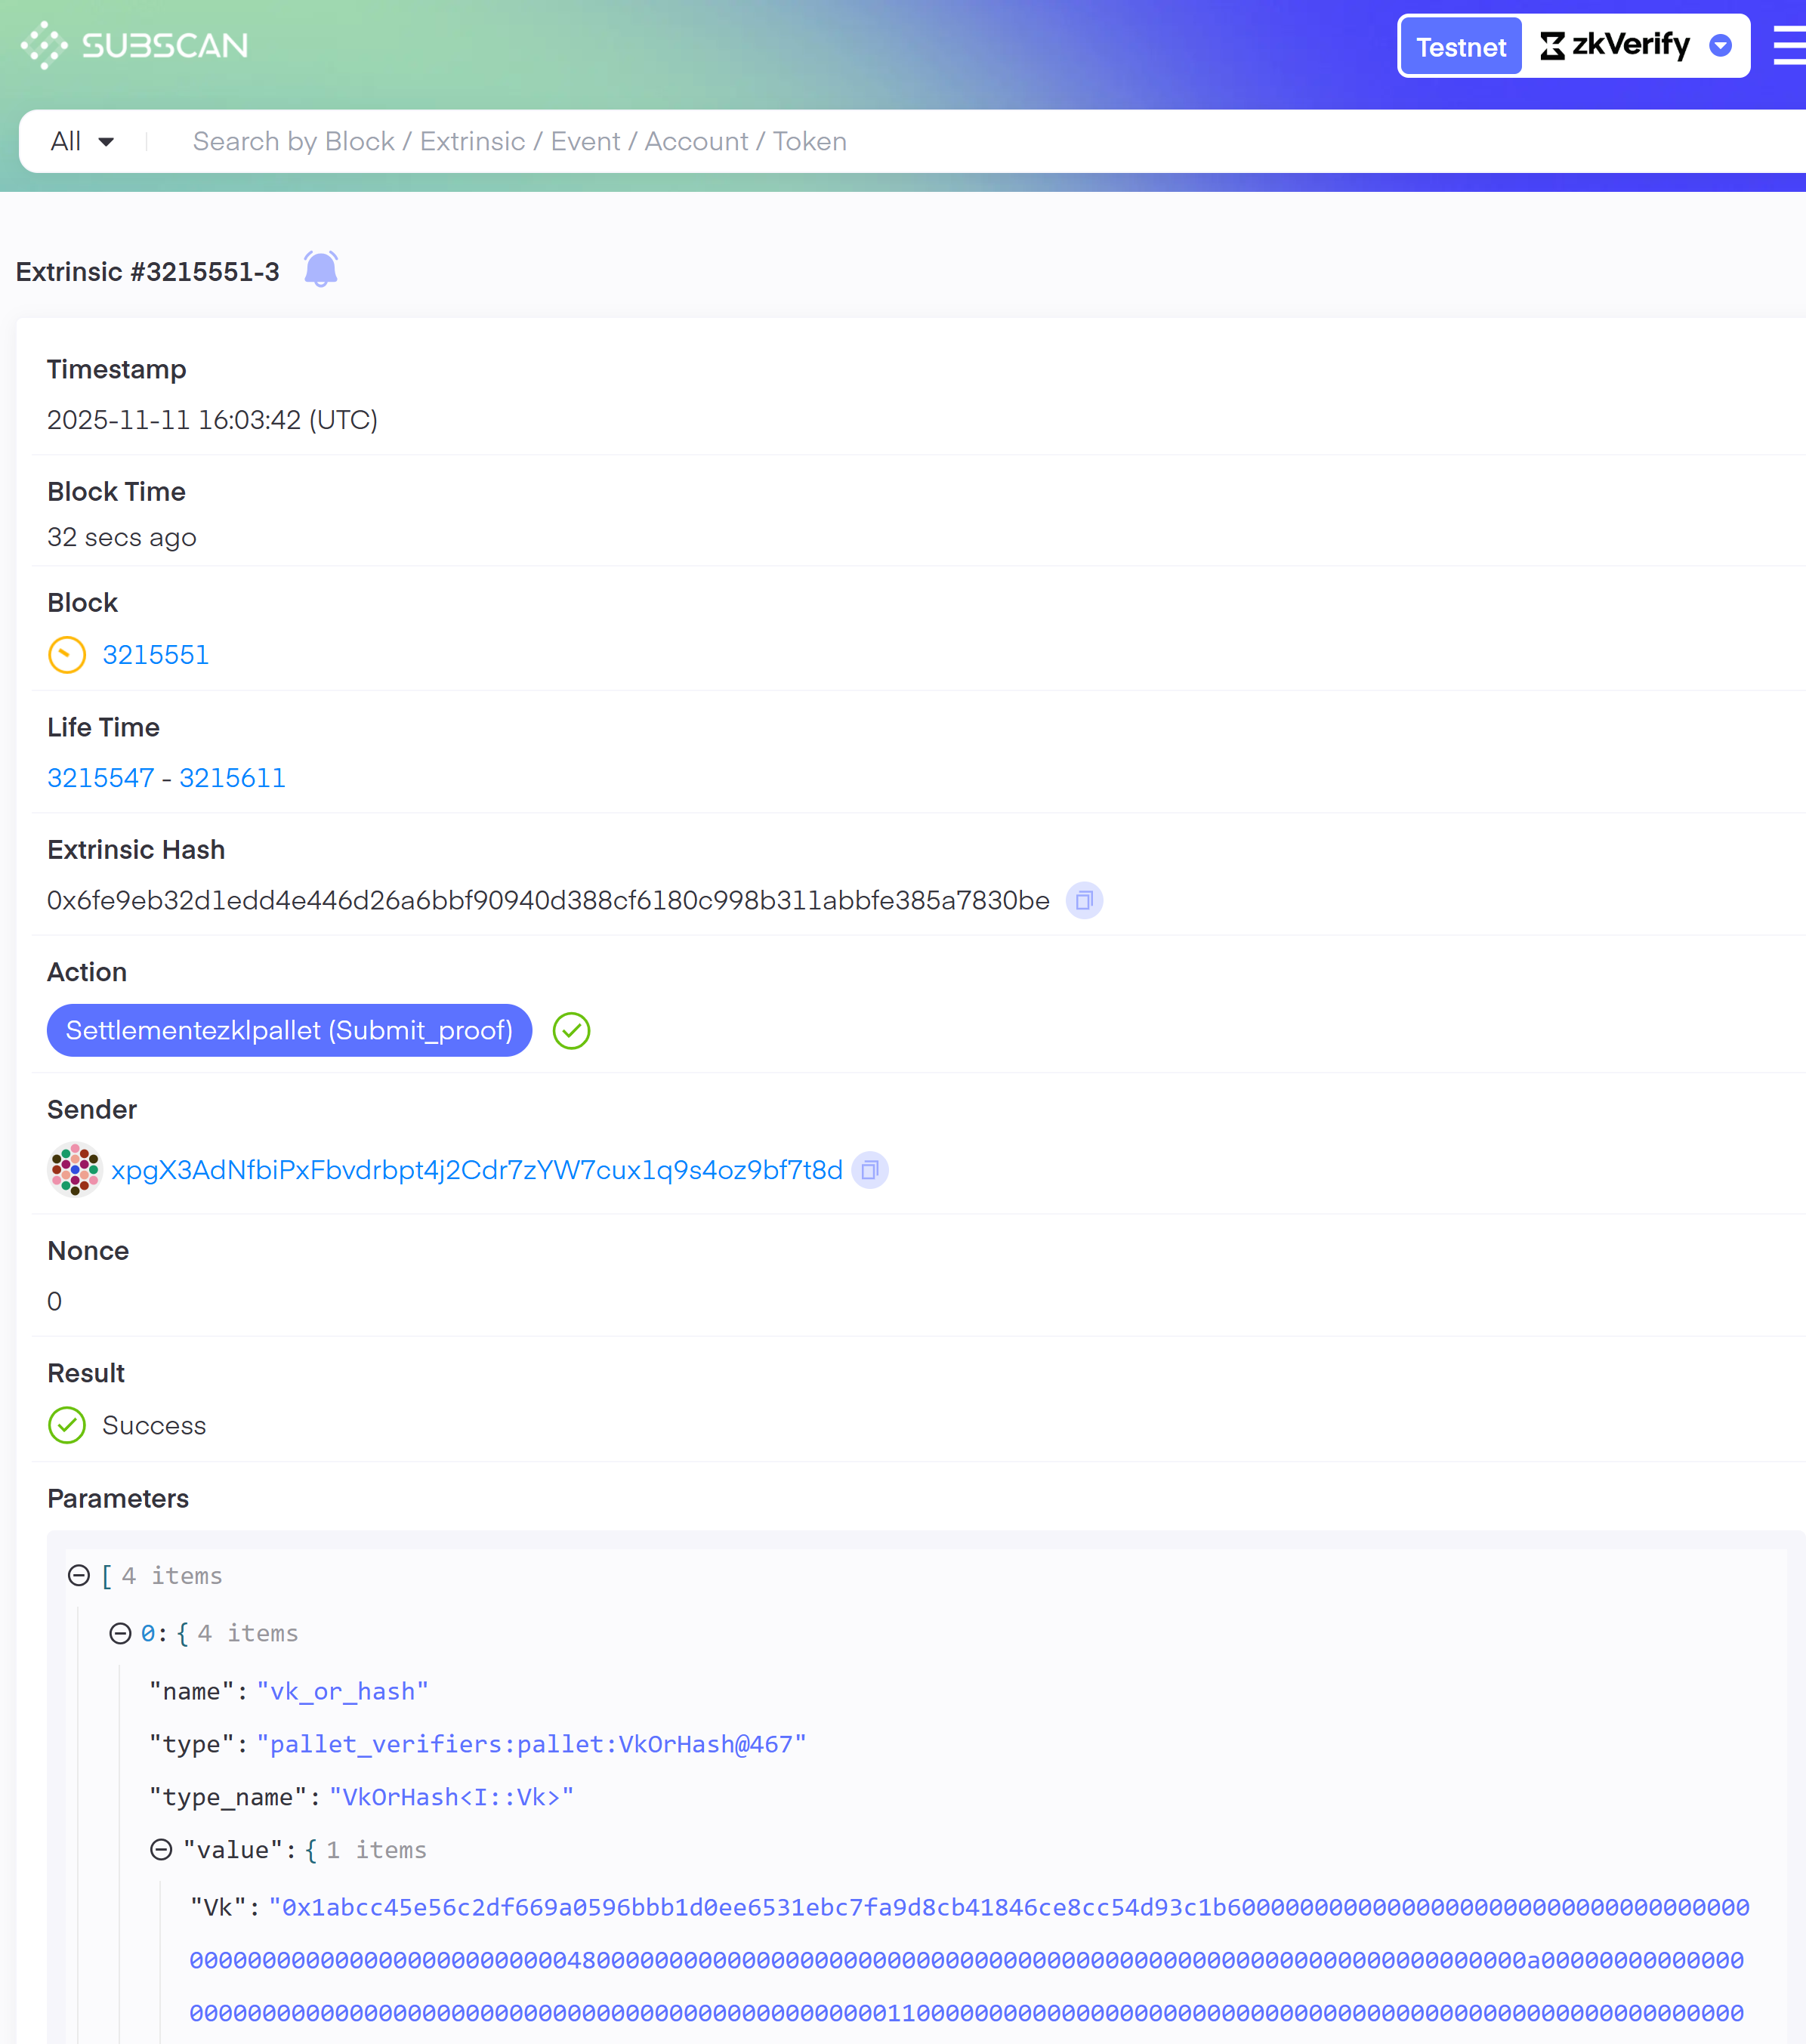
You can check details about the verified proofs using the txHash on our zkVerify explorer.
- Circom
- Risc Zero
- Ultrahonk
- Ultraplonk
- SP1
- Ezkl

By running the above code snippet, your attestation proof will be saved at attestation.json file. After completing this process, we have successfully verified our proof with zkVerify and the next steps will be to use this attestation proof for our business logic onchain. Next we will be verifying the proof reciepts through a smart contract. You can check this tutorial to understand more about the smart contract verification part.