运行新 RPC 节点
Prepare the Environment
要运行新的 RPC 节点(节点类型见 此处),在终端进入 compose-zkverify-simplified 根目录:
cd compose-zkverify-simplified
运行初始化脚本:
scripts/init.sh
脚本交互会询问:
- 节点类型:选择 RPC
- 网络:当前仅 testnet
- 节点名:自定义标识
- RPC 方法暴露范围:仅安全方法或全部
- Archival:全量或裁剪存储
结束后,脚本会在 deployments/rpc-node/network 下生成文件,并提示类似:
=== Run the compose project with the following command:========================docker compose -f /home/your_user/compose-zkverify-simplified/deployments/rpc-node/testnet/docker-compose.yml up -d========================
启动前可编辑 deployments/rpc-node/network/.env 进行自定义:# Node miscellaneous 为容器相关,# Node config 为 Substrate 配置。
手动调整需充分理解其影响。
Run the Node
开始运行节点:
Within the terminal type the command below which runs the Docker container:
docker compose -f /home/your_user/compose-zkverify-simplified/deployments/rpc-node/testnet/docker-compose.yml up -d
执行后节点后台运行,检查:
docker container ls
and you should get something similar to:
CONTAINER ID IMAGE COMMAND CREATED STATUS NAMESca4bdf2c6f05 zkverify/relay-node:latest "/app/entrypoint.sh" About a minute ago Up About a minute rpc-node
显示如上即启动正常。
如需探索,可继续阅读下方可选步骤。
Explore and Interact with the Node
查看日志:
docker logs rpc-node
and you should get something like:
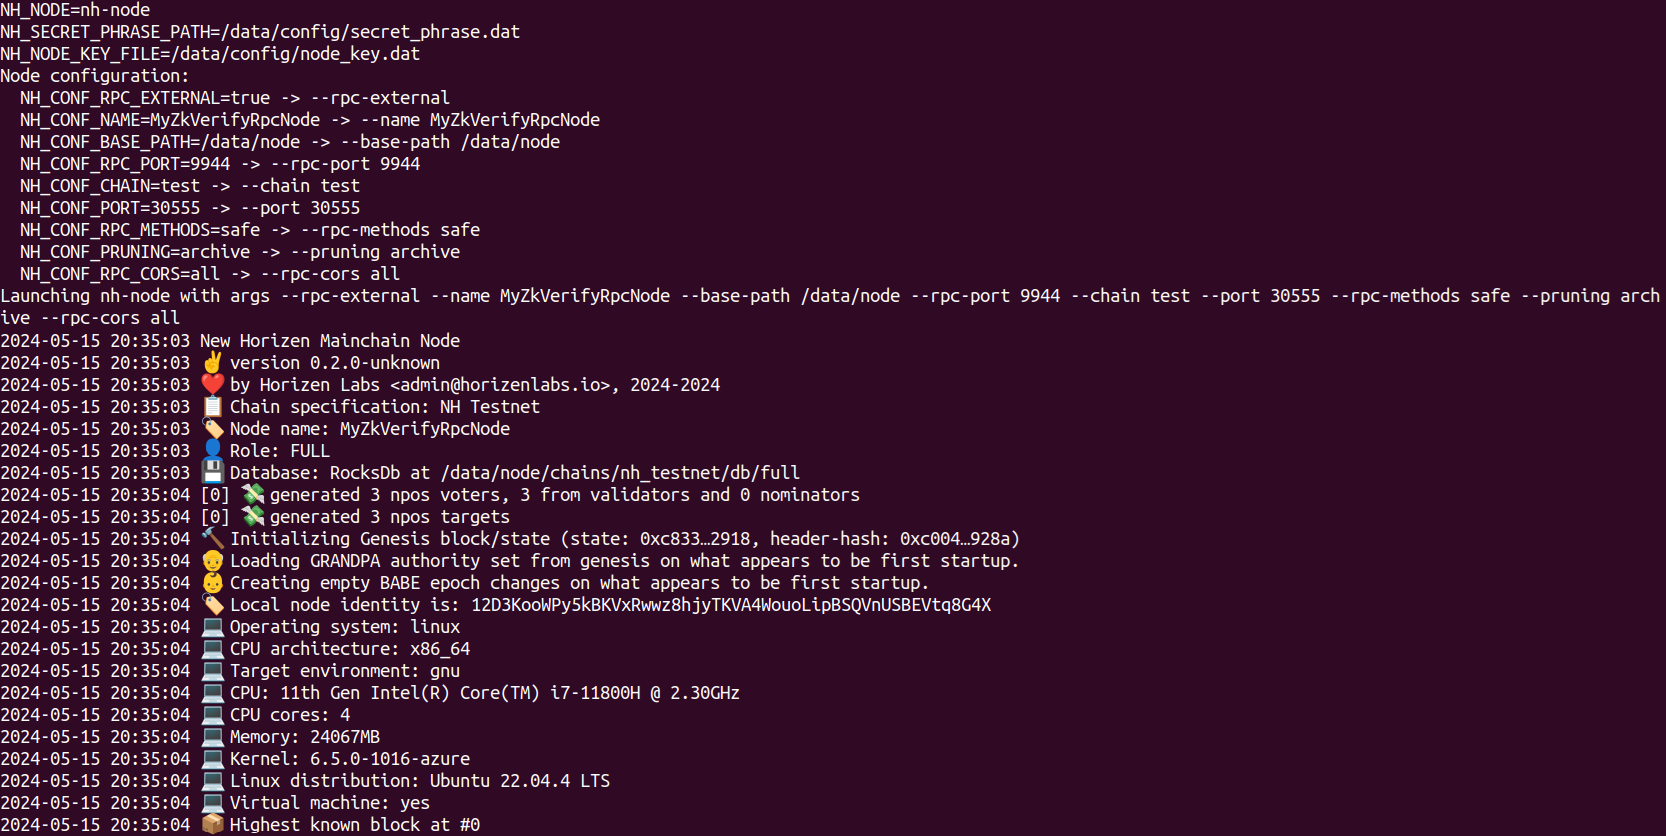
输出说明:
Launching zkv-relay...: 说明.env已被解析且启动成功。Node name: ...:ZKV_CONF_NAME已传递。Local node identity is: ...: 节点唯一标识。Highest known block at #0: 首次运行,仅创世块。
继续观察同步(稍等几秒后):
docker logs rpc-node
And you'll see the synchronization is taking place:
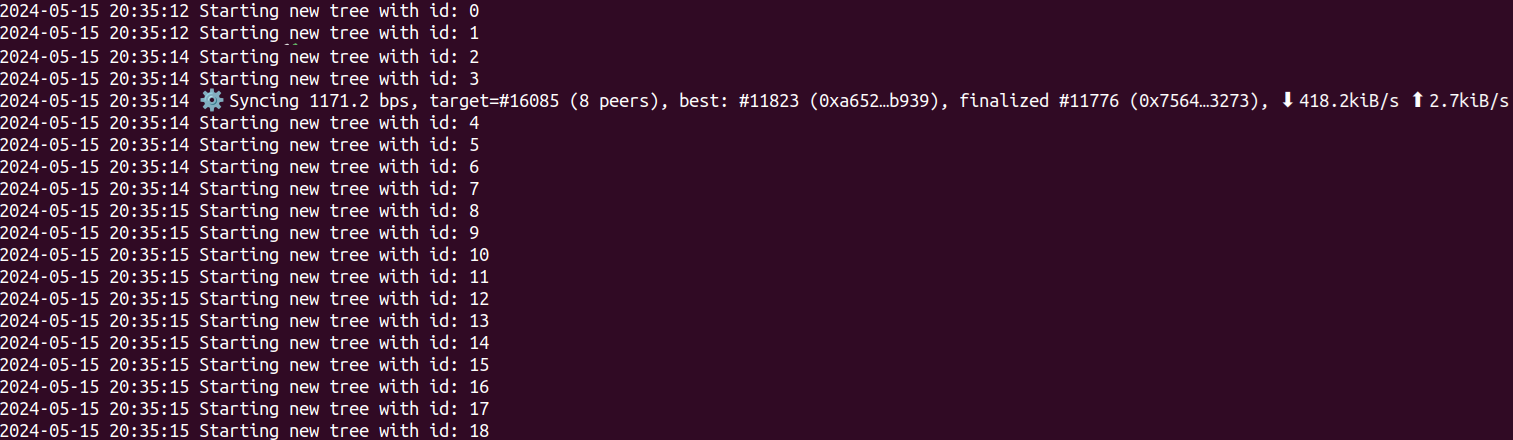
关注:
Starting new tree with id: XXX: 历史已验证的证明树。Syncing ...: 当前高度、目标高度、对等节点数与速率。
同步时间取决于链高度,通常几分钟内完成。完成后类似:

初次批量同步完成后,将每 6 秒接收新块。
借助 Docker,重启无需重新全量下载,可尝试:
docker compose -f /home/your_user/compose-zkverify-simplified/deployments/rpc-node/testnet/docker-compose.yml downdocker compose -f /home/your_user/compose-zkverify-simplified/deployments/rpc-node/testnet/docker-compose.yml up -d
then inspect recent logs with:
docker logs rpc-node --tail 100
此时日志不会再有长时间初始下载。
如需清空链数据,可停容器并删除卷:
docker compose -f /home/your_user/compose-zkverify-simplified/deployments/rpc-node/testnet/docker-compose.yml downdocker volume rm zkverify-rpc-testnet_node-data
Interacting with the node
现在可用 PolkadotJS 交互:访问 此地址,在左上下拉选择本地节点:
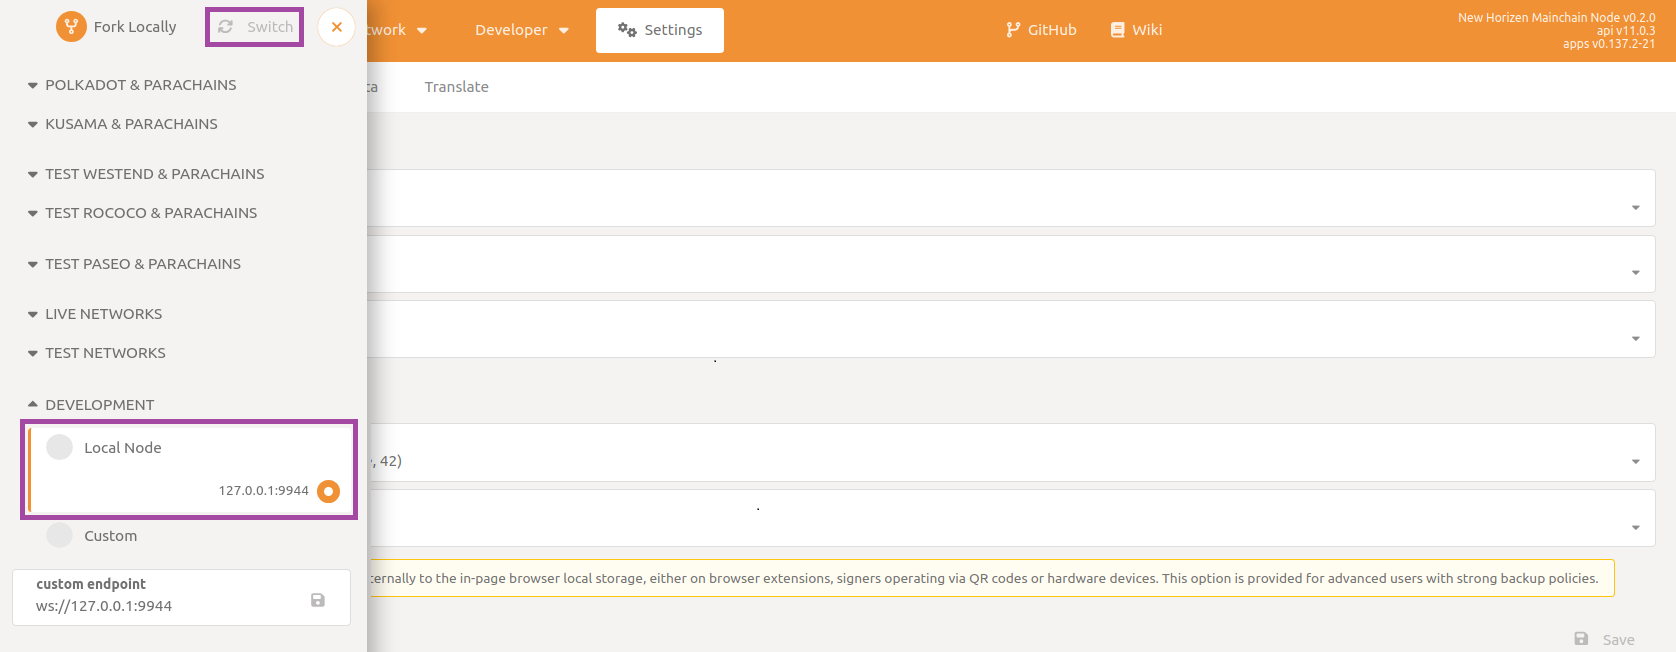
若无法连接,检查 .env 中 ZKV_CONF_RPC_EXTERNAL 是否为 true,NODE_NET_RPC_WS_PORT 是否与自定义端点一致。
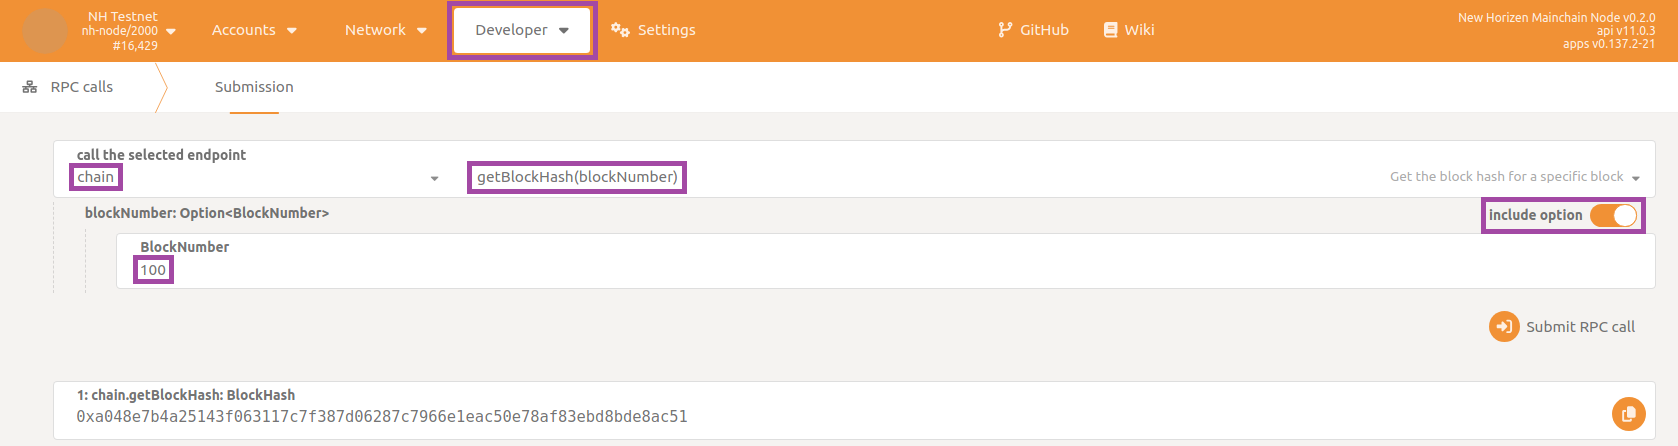
可先提交 RPC 查询区块哈希与内容。
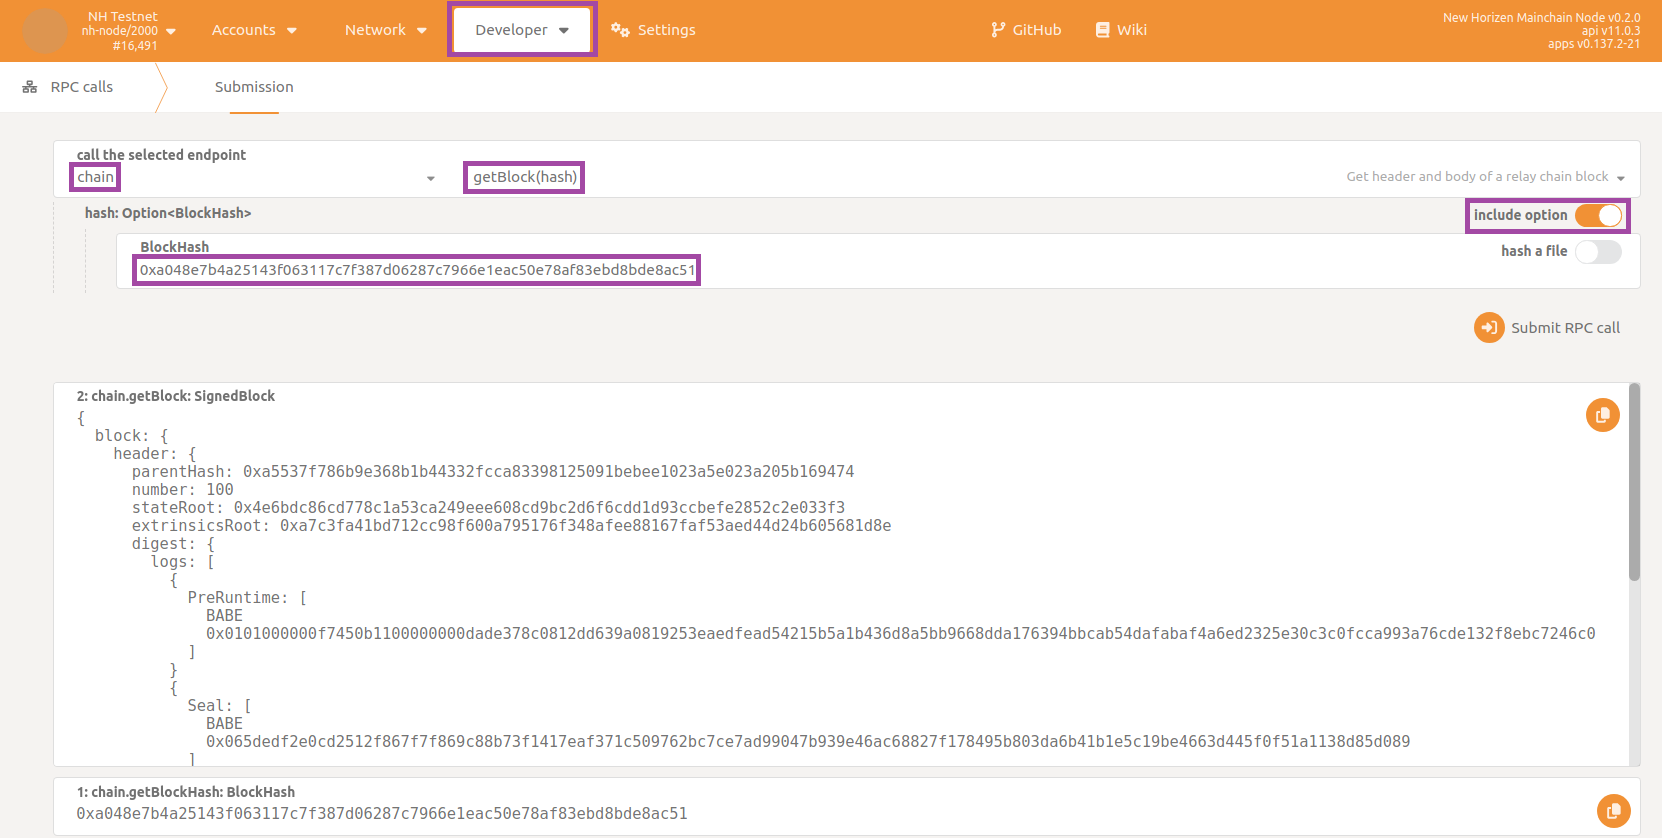
Navigate to to the section called Developer then to the subsection RPC calls and select the chain endpoint and command getBlockHash. Make sure to enable the include option flag, and then type in a block number (100 in this example). Finally click on Submit RPC call button.
返回区块哈希后,用 getBlock 获取区块体。
Again, the node is responding to your request, this time providing the full body of the queried block.
若 init.sh 选择了非 archive,过旧区块可能被修剪,出现 State already discarded。
也可尝试转账。在 Substrate 中账户对应一对密钥(类似比特币或以太坊账户)。
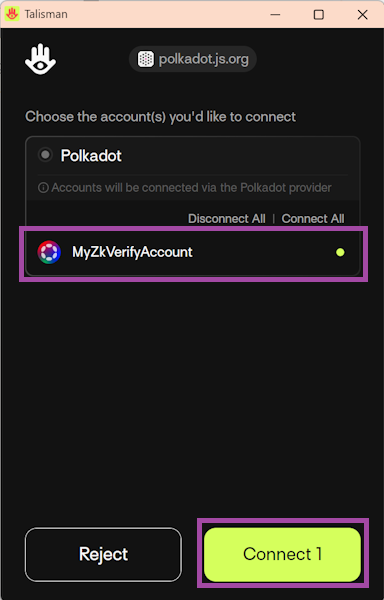
通过 PolkadotJS 提交 extrinsic 需安装兼容扩展钱包(如 Talisman 或 Subwallet),刷新页面后弹窗授权。
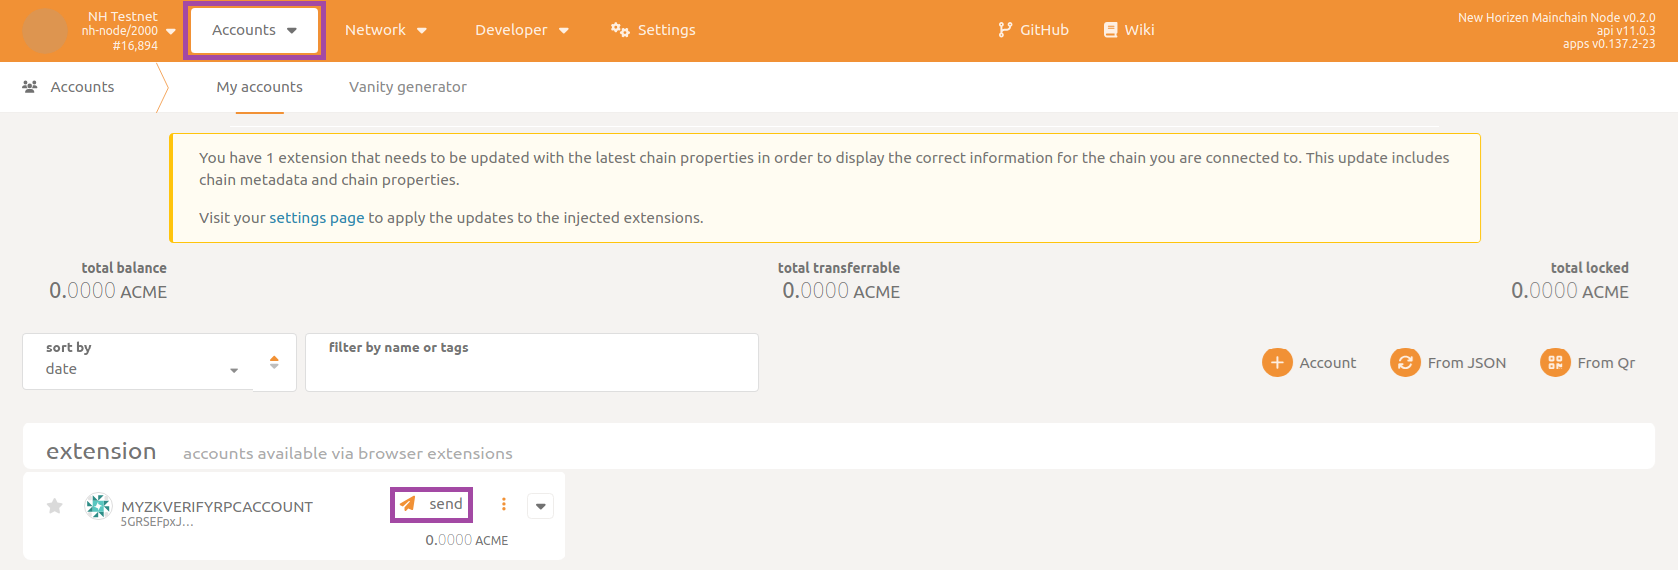
Next, navigate to the section Accounts then to the subsection Accounts and send funds by clicking on the send button:
选择账户、填入目标地址和金额,点击 Make Transfer。
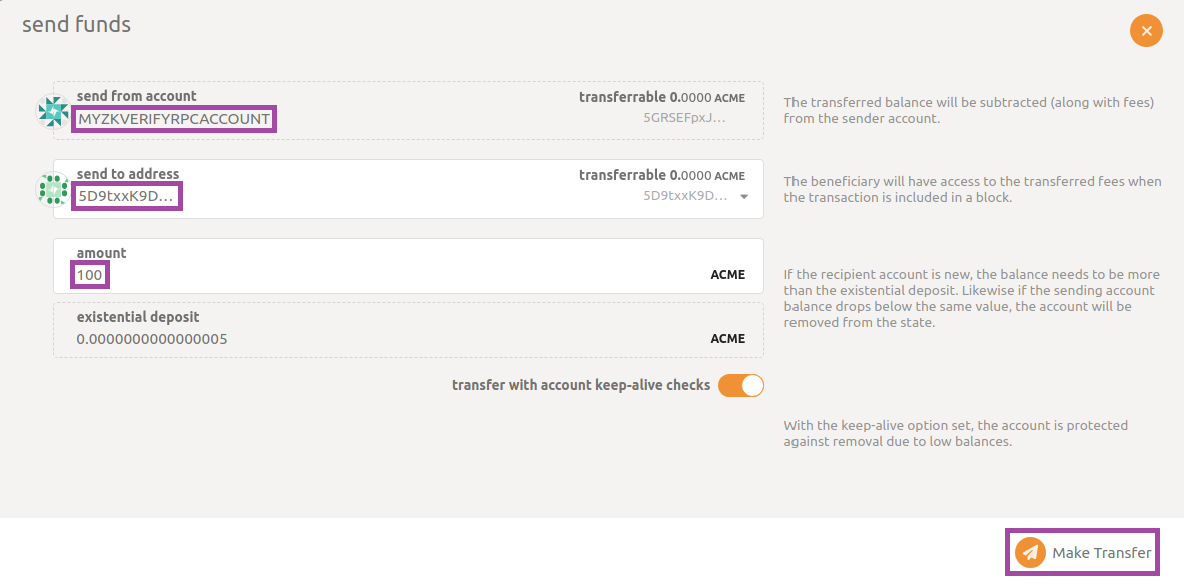
数秒后会弹出绿色提示,确认交易提交与转账成功。